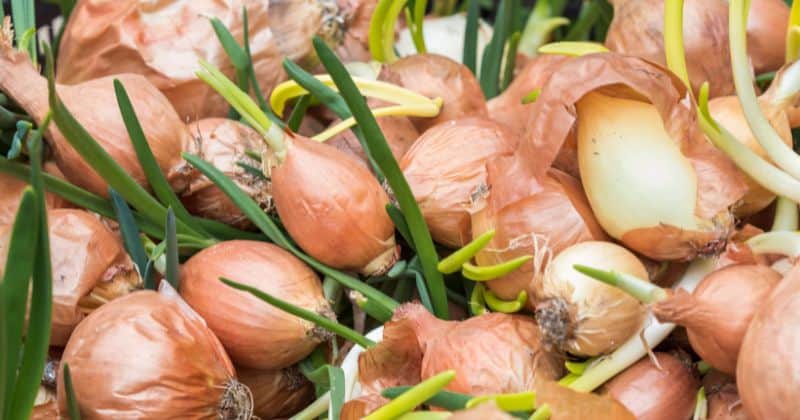
Harvesting onions is one of my favorite activities. However, this can be a challenge for newbies.
Onions are among the key kitchen ingredients. They are present in almost all dishes across the world. They are cultivated from transplants, sets, or seeds. Their use for food is dated back more than 4,000 years ago.
These famous cool-season vegetables are easy to grow and manage. After harvesting them, I get a kitchen staple I can consume throughout the fall and winter.
One of the best things I like about growing onions is that they can tell you when they are ready for harvest. For example, I can check their necks, the last leaf, falling tops, the stalks, and the number of leaves.
What are the Signs That Onions Are Ready for Harvest?

Beautifully bulbous onions can create a lot of culinary creations, from spices and dips to salads and soups.
When I got interested in growing onions, one of the biggest questions I asked was, when to pick onions after planting?
If you want to use onions as scallions or spring onions, I recommend harvesting them young a few weeks after planting. Meanwhile, if you wish to have full-sized bulbs, allow them to grow and mature.
I have been growing and harvesting onions for a long time, and I will share some signs they are ready for harvest.
Sign #1: Soft Neck
The carbohydrate transfer from the leaves to the rings is completed once the area where the leaves meet the bulb (the place right above the neck starts to feel soft. In other words, the rings’ final cell division has finally occurred.
During this stage, I water the onions less frequently. That way, black mold that occurs in wet soils and sour skin can be prevented.
Sign #2: Last Leaf
Another way to tell when to pick onions after planting is by examining all the leaves, specifically the last leaf to appear. I discovered that the leaf sheaths tend to mature and dry in order, from the oldest leaf to the youngest.
When you pull the onions from the ground before the last leaf dries, rot usually occurs during storage. The top of the onion or neck cavity must not be soft or sunken before pulling the bulbs out of the soil.
TIP: Remove the onions in the morning before direct sunlight and the worst of the heat occur.
Sign #3: Falling Tops
Have you ever noticed tops falling over? This indicates a 100% soft neck despite some tops being down. This often occurs 100-120 days after planting.
Whenever I want to consume onions immediately, I pull them without hesitation. At this stage, I notice excellent skin development. There are also enough green tops, which help avoid sunscald during drying.
Sign #4: Yellowish or Brown Stalks
Knowing when to pick onions after planting helps get the best flavor. Bulb onions are often harvested around 100 to 125 days after planting. They communicate and let you know once they are mature and ready for picking.
If you see that the stalks turn yellowish or brown, it’s a telltale harvest sign. You will also notice that the stalks topple over and dry out slightly. So, be ready to harvest them.
Sign #5: Number of Leaves
One way I can tell my onions are nearing harvest time is to count the number of their leaves. Although onions with 13 leaves are considered perfect, some varieties mature with fewer leaves and are still perfectly good.
When onion plants have reached at least 7 leaves, start observing them and look for other signs that make them ready and mature for harvest.
How to Harvest Onions
Harvesting onions is not as difficult as many people think. In fact, the process is as easy as pulling them out of the soil.
Assuming that you have already observed the signs that they are ready for harvest, here are easy steps to harvest your onions.
Step 1: Stop Watering the Onion Crops
If you see the leaves on the first few onion plants falling over, stop watering them. Leave them in the ground for around 7 to 14 days to let them complete the maturing stage, depending on how humid or dry the climate is.
Withholding water helps keep the bulbs from rotting. If your area is prone to big rainstorms, it is best to harvest them once they are fully grown since moisture causes trouble for them.
Step 2: Dry Out the Roots
The best time to harvest onions is on dry, sunny days. You can dig around the plants to lift the ground from the ground or pull each onion by the bulb.
Ensure the stems are intact because grabbing weak stems can cause them to pull off completely. This also helps prevent or reduce the chance of rotting.
Look for an open, sunny area and lay onions for 1 to 2 days to dry the onions.
Step 3: Cure the Onions
After getting some sun, it’s time to move the onions into a shady, sheltered area, like a well-ventilated garage, a covered porch, or under a tree. Then, spread the onions one by one.
You just have to set the onions to dry out until their stems become brittle and brown; there is no need to clean them off. This allows them to become less vulnerable to disease.
Step 4: Trim the Onions
When you notice that the roots and tops of the onions are thoroughly dried, trim the roots and cut off the stems using garden scissors. You will get clean, smooth onions since a couple of layers of their outer skin often flake off with the stems.
Step 5: Store the Onions
The best place to store onions is in an airy, dry, and dark space. You can also keep them in burlap sacks, milk crates, wicker or wire baskets, nylon mesh bags, or brown paper bags.
If you plan to store onions for long periods, the recommended temperature is 32° to 45°F at 65% to 70% humidity. However, the temperature should not exceed 70°F in order for the onions to last.
In short, keep onions above freezing point but below room temperature.
Step 6: Save Tiny Onions
I usually save tiny onions to plant when spring starts. They look like shallots. They mature into full-sized bulbs in less time. Then, I will enjoy the new harvest sooner.
Which Onion Varieties Store the Longest?

Long-storing onions do not grow in the south. However, northern climates have long-day storage onions for winter storage, including red, yellow, and white globe onions with mild to moderate pungency.
Intermediate and short-day type onions are usually sweet, and you can store them for 1 to 3 months. Red Creole and Texas Legend are the exceptions since they sometimes last for over 4 months.
Here are the different onion varieties with their shelf life in storage:
- Texas Legend – 3 to 4 months
- Red Liver – 3 to 5 months
- Yellow Spanish and Ringmaster – 4 months
- Highlander – 4 to 5 months
- Blush – 5 to 6 months
- Sterling – 6 months
- Red Creole – 6 to 7 months
- Red Zeppelin – 6 to 8 months
- Redwing – 8 to 10 months
- Stuttgarter and Copra – 10 to 12 months
- Red Wethersfield – more than 12 months
So, be sure to know your climate first and the onions’ shelf life in storage before planting.